To directly access your administration panel, use this link: Log in here
This article applies only if you have not set your production order features during the initial product review and activation. |
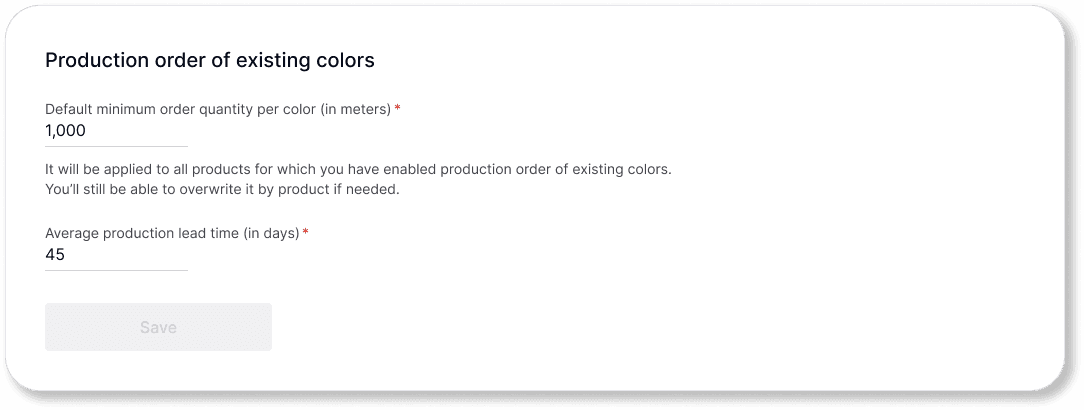
Step 1: Set a default minimum order quantity (MOQ)
Navigate to Manage > Product settings > Production order |
|---|
Set default values:
Define the minimum order quantity MOQ per fabric (in meters).

The default minimum order quantity per color.
Input the average production lead time (in days).
This setting will apply to all products for which production orders are enabled by default. You can override these defaults on each product page later if needed.
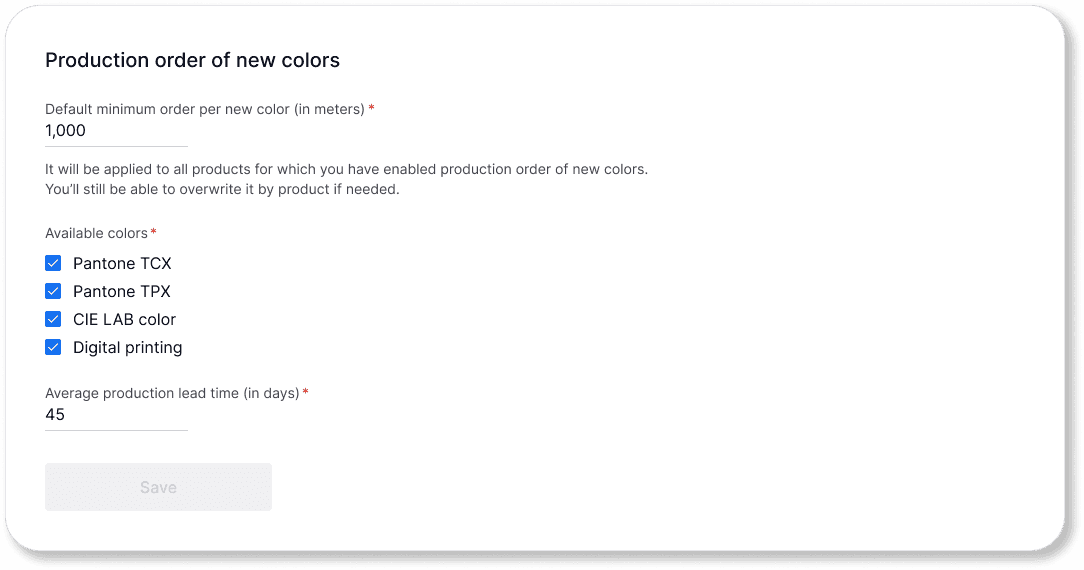
2. Set production order for new colors if applicable:
If clients request new colors, fill in the required information and choose the method your company uses, such as:
Digital Printing
Pantone
CIE LAB Colour
Specify the average production lead time (in days) for new color requests.
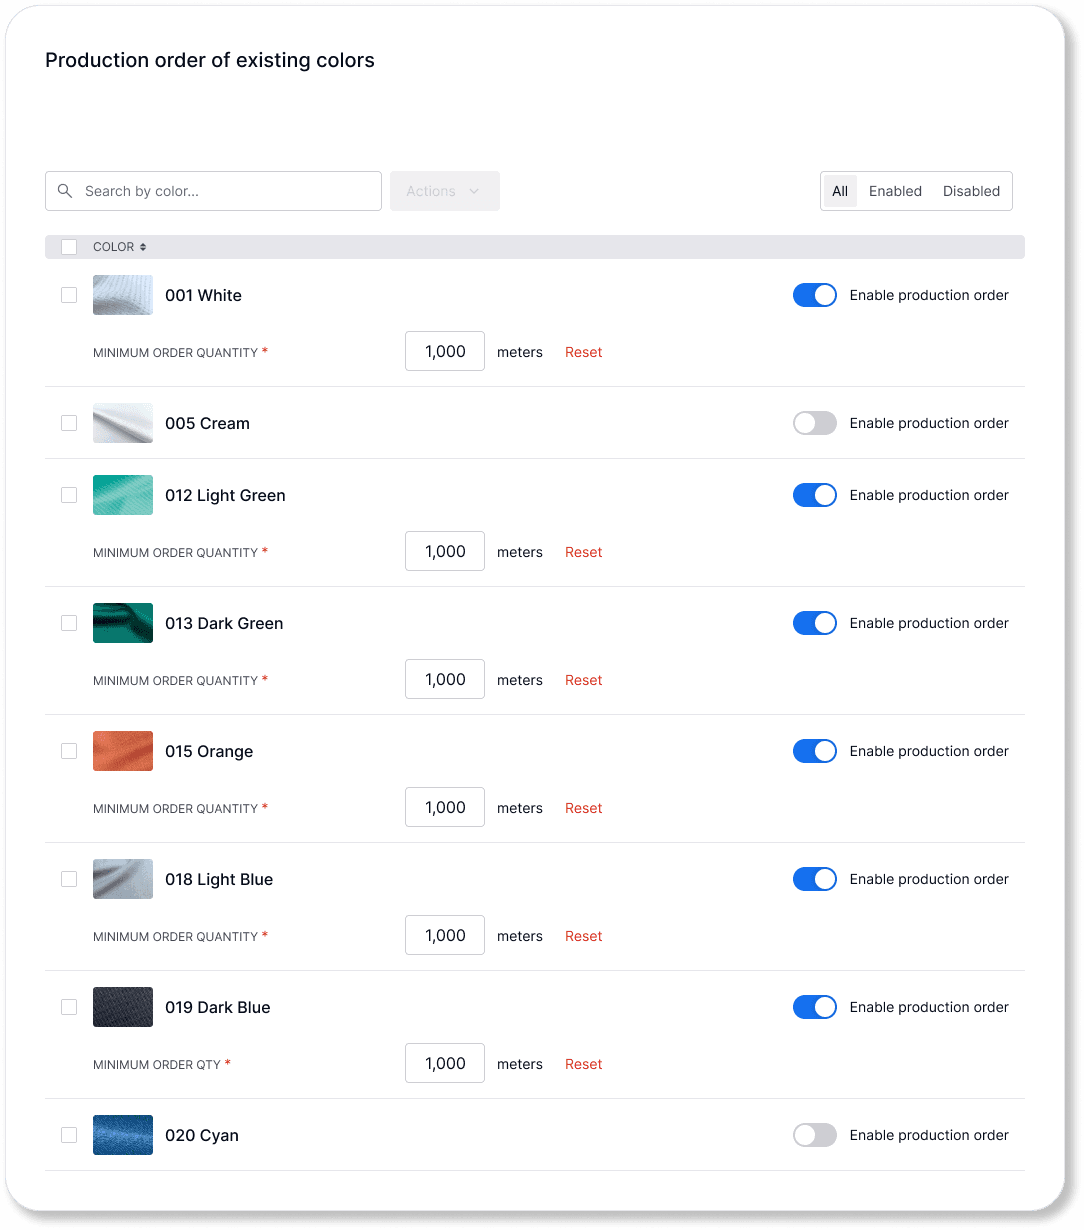
Step 2: Enable and edit production orders for specific products
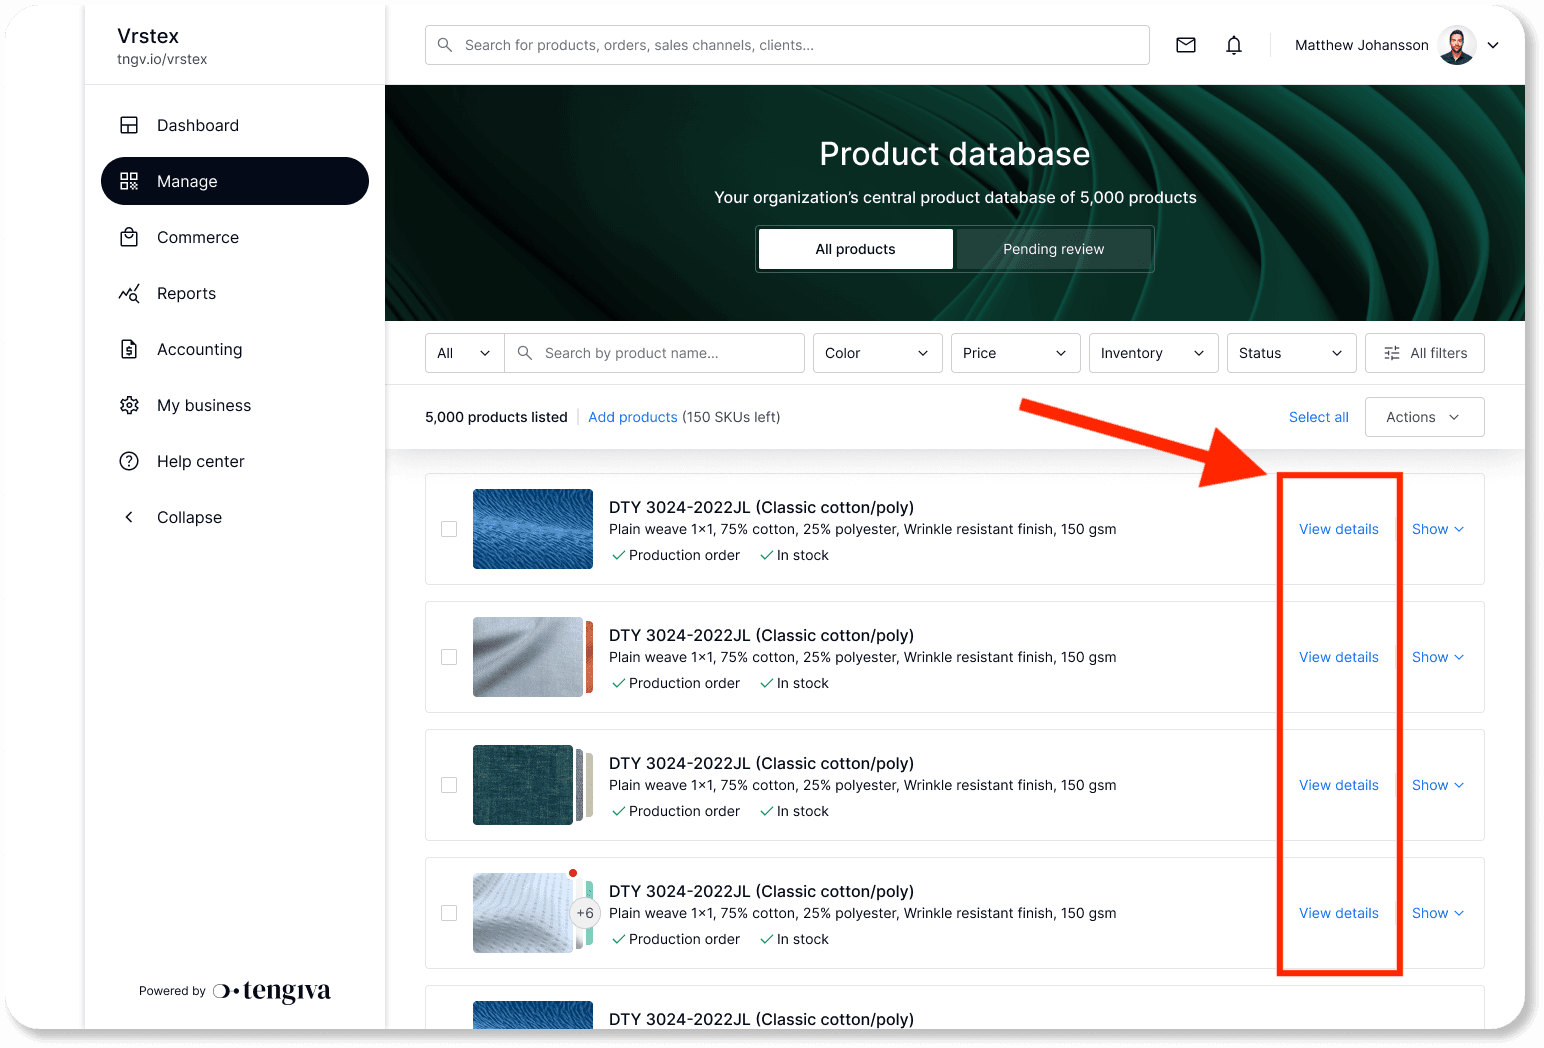
Navigate to Manage > Product Database |
|---|
Select the specific product you want to configure by clicking "View".
2. Click on the "Production order" tab.
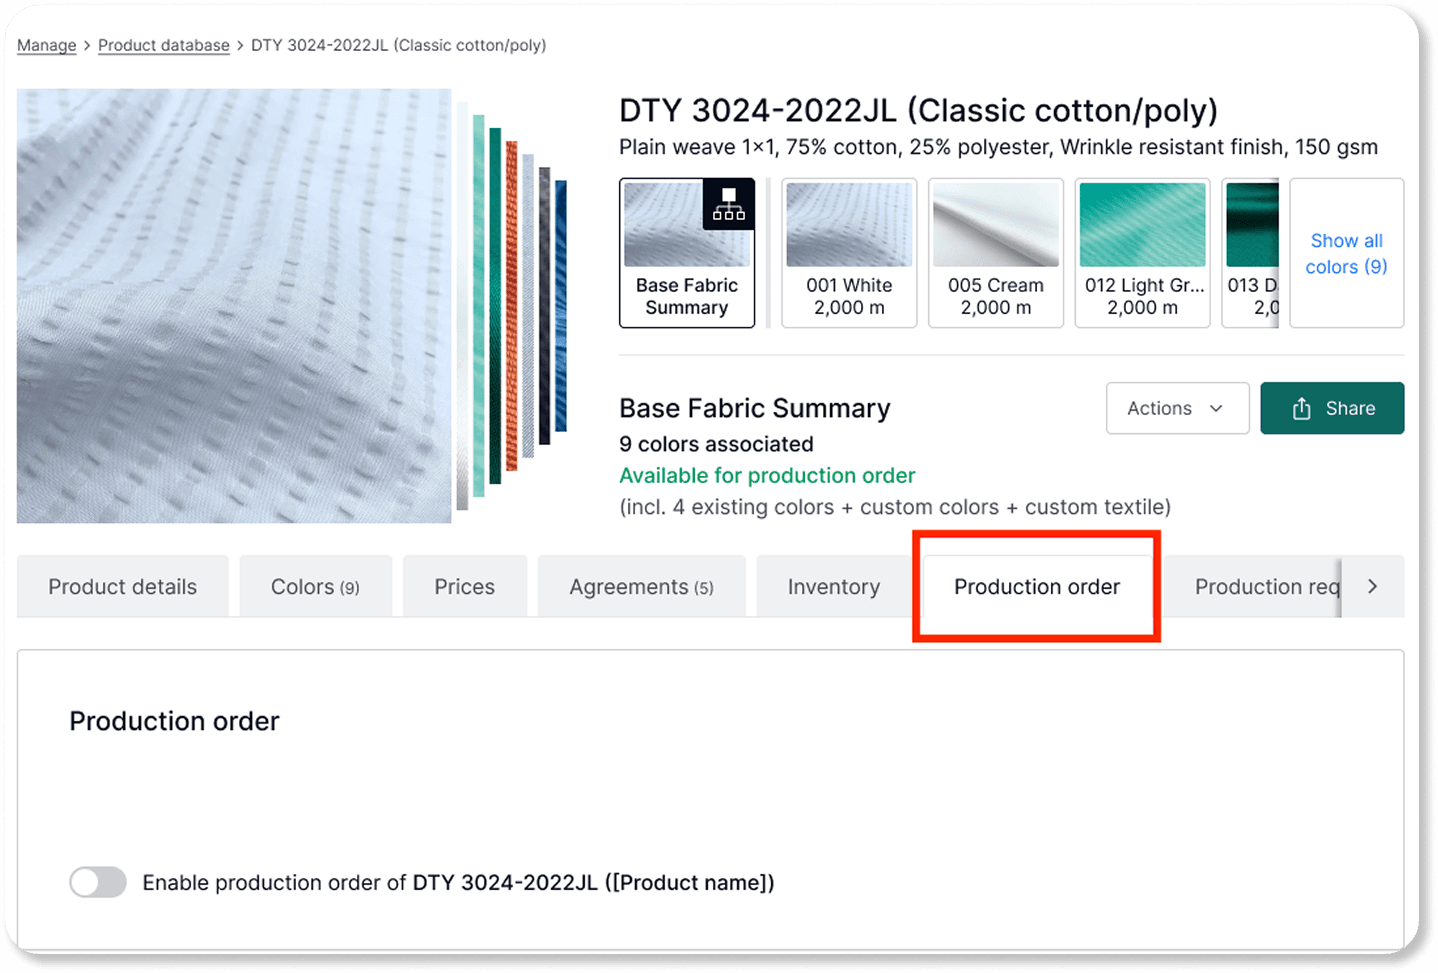
3. Click on the button switch (toggle) to enable the feature.
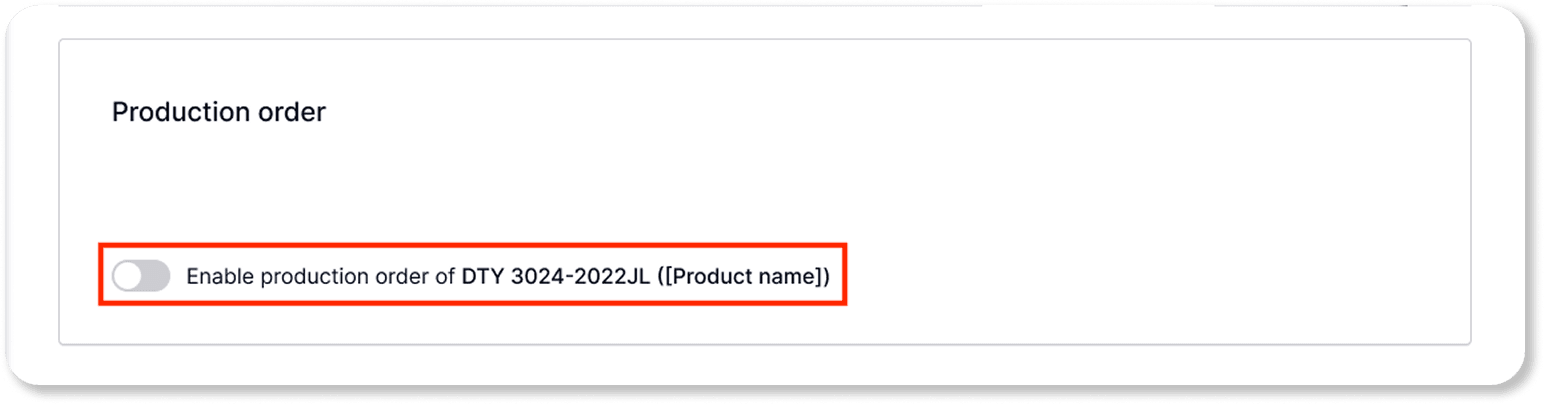
4. Review and customize product-specific settings:
By default, the settings from Step 1 will be applied to the product.
You can adjust these settings as needed for the specific product:
Update the MOQ or lead times for existing colors.
Enable or disable production orders for existing colors or new colors.