Everything you need to start with your Mini-Studio today is on this page. Start with Step 1 and work your way down.

Start Now | Key Dates & Tasks
1
How to assemble your device

2
Required for the training session scheduling
Share your first product upload CSV (Excel)
3
BEFORE your FIRST USE
Schedule your training session with your account manager
Make sure you have scheduled your training session before using the device. Contact your account manager to do so. For any additional support contact suppliers@tengiva.com
4
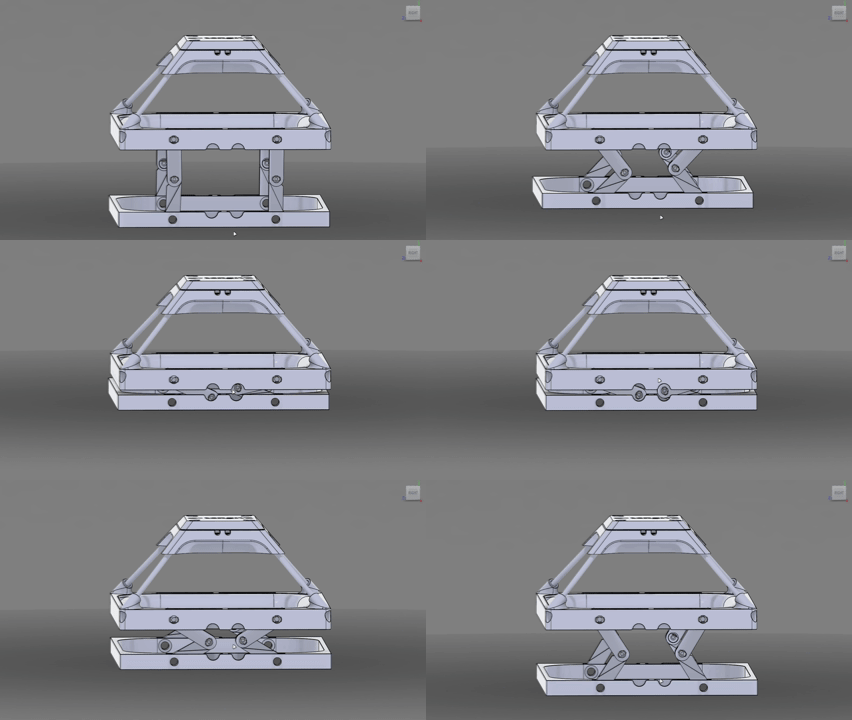
Expand the legs for Presets A & B (High position)
The High position (expanded legs) serves for regular materials.
Whereas, the low position (folded legs) is for very detailed and fine woven/knitted materials, in solid colors only.
5
How to use your Mini-studio

Some textiles may not work with the Mini-Studio
The Mini-Studio may not process transparent textiles, textiles with holes, or dark denims with very small white yarn areas (as it requires enough contrast for color calibration). For these cases, we offer a free premium photo service for a limited time. Simply send 50 cm to 1 meter of the textile to our facilities, and we will digitize it for you. Ask your account manager for more details.